
You’ve just returned from your first birding trip with a camera full of photos, now you’re ready to go through them all, edit them, and post them for the world to enjoy. Let’s get started! In this guide, I’m going to be showing you how to edit bird photos with Adobe Lightroom. This article shows some of the tweaks I make to my photos before posting them online but won’t go into the technical things that each change does, you’ll see it for yourself as you edit your own photos.
If you don’t already have Lightroom, you can get an Adobe Creative Cloud Photography subscription which includes both Photoshop and Lightroom for just $10 a month. I have a subscription, and it’s great because it ensures you always have the latest version of the software, and it will sync your photo library and settings between all of your computers, tablets, and mobile devices.
Update: Adobe is now offering Lightroom Mobile for free on iPhone, but I recommend for you to do your editing on a computer unless absolutely necessary. Editing bird photos on a full-fledged computer allows you to be more precise, work faster, and take advantage of all the features the paid version of Lightroom has to offer.
Why Lightroom instead of Photoshop?
There are two main advantages of using Lightroom to edit your photos. Lightroom’s sole purpose is to edit and manage photos, so it takes all of the powerful features that Photoshop has and strips away everything unnecessary then throws in an entire interface to manage your photos and make selects of photos to edit. Since it is meant to be used with large numbers of photos, you can seamlessly switch between editing different photos instead of having to open up 30 files in Photoshop in separate windows.
Import
To get started, I save all of the photos from the trip into a folder on my computer. I open up Lightroom and go to File>Import choose all of the files from the day, and import them. There are a few ways to import photos, and it depends on how you want to manage files on your computer. If you have a lot of space, you can choose to copy them and keep a permanent unedited, master file in Lightroom for future reference, or you can simply “Add” the photos into the program and leave them in their current location. Since I am editing from a MacBook Air, this is the option I choose to save hard drive space.
Review and Select
Once the photos have finished importing go to the ‘Develop’ tab, and start looking through your photos to find the best of the best. On photos that you think have potential press a number between 1 to 5 on your keyboard. This will assign a star rating to the picture. After you’ve looked through the photos and assigned stars to the ones you want to edit, go to Filter > Rated, to see only your selected photos.
Crop
A majority of birds are very small, so cropping is almost always necessary (unless you have a really powerful lens). I usually set my focus to the middle of the frame when taking photos, then I crop the bird into a better composition afterward. Consider two things when cropping your photo: how sharp is the image, and what feeling does the photo give. Depending on how sharp the image is will sometimes determine how close you can crop it—but it’s easy to get carried away with cropping too closely. It’s lovely to see all the fine details, but also seeing the bird surrounded by its natural habitat, or positioned in a nice part of the frame can bring life and story to your photograph. Lightroom will automatically show third rulers to help you compose the crop better, and all of the changes that you make to the image are non-destructive, so it’s easy to readjust the crop later in the editing process if needed.
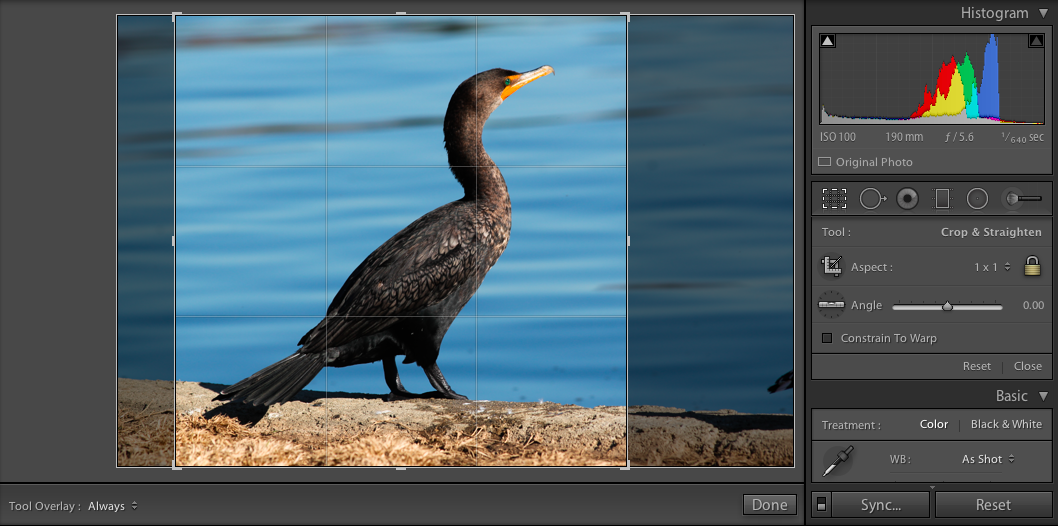
Another very important thing to remember when cropping: Aspect Ratio (adjusted on the right side). If you plan to print the photo you are editing, crop it with an aspect ratio of the size you are printing it, 4×6, 5×7, 8×10, etc. If you do not crop it with this aspect ratio when you print the image, it will be automatically cropped and it can easily ruin your print! Sometimes printing services won’t show a preview of the print, so you won’t have any idea of the inevitable auto-crop unless you plan ahead. Don’t let this happen to you! I learned this the hard way and had a whole batch of photos ruined. Keep your Lightroom backed up so you can adjust the aspect for future prints.
 Tone Curve
The first thing I do is adjust the Tone Curve on the image. I usually bring the right side up and the left side down ever-so-slightly. This adds a bit of contrast to the image and makes it pop more. Don’t overdo this otherwise you can easily lose detail in the light or dark parts of the image.
Exposure, Highlights, Shadows, Whites, and Blacks
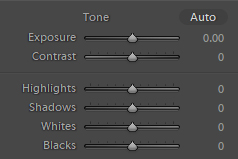
After adjusting the curve, if parts of the image are too dark or blown-out, you can adjust either of these sliders to further refine parts of the image.
Temperature Balance
Adjust the temperature slider on your image to increase or decrease the warmth of the photo. This step ensures that the subject appears the same color you saw with your own eyes. Occasionally when I shoot images in RAW the unedited image will have a blue hue to it. A quick increase in the temperature makes a drastic difference in the entire photo. See the following example of a Blue-gray Gnatcatcher.
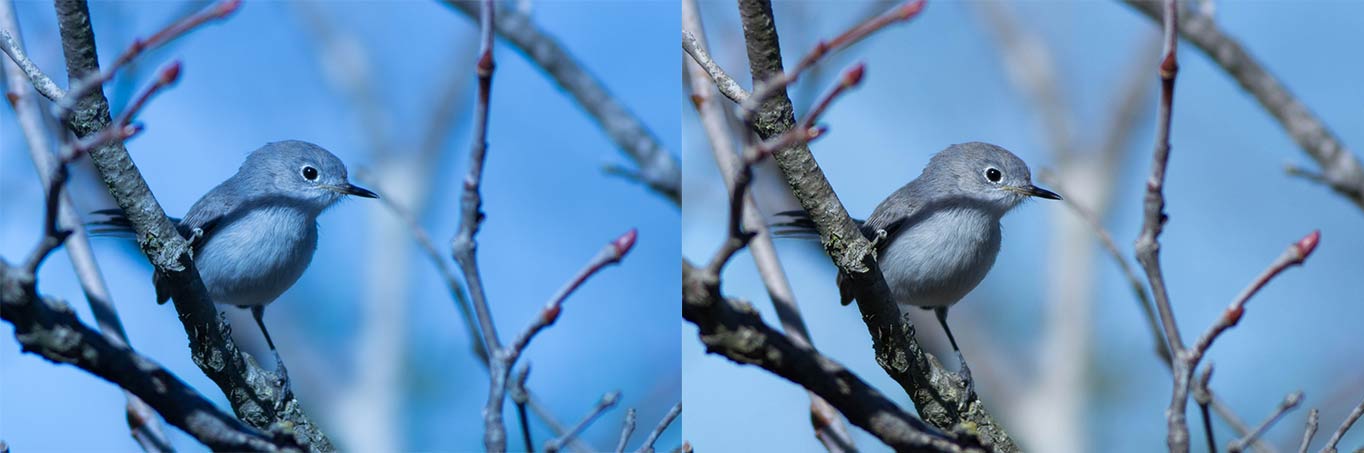 Before and after of a Blue-gray Gnatcatcher with temperature balance adjustment.
Clarity and Vibrance
You can add a very small amount of ‘Clarity’ and ‘Vibrance’ your images, but only less than 10 or 5 respectively. Any more and you risk having an amateur look to them. They should still appear natural. You’ll notice on some images it has no noticeable effect, but on others, it can make them look nicer.
Sharpening
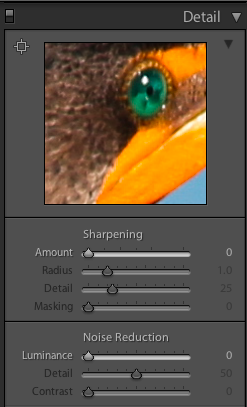
If you take a photo that you really like, but it’s a bit soft and not quite as ‘tack sharp’ as you would like it, add a small amount of sharpening to the image. This can give it a bit more of a hard edge, but at the expense of adding noise to the image if it’s overdone. Noise can easily be seen when viewing the image at 100% size or on prints. Additionally, noise can be reduced by turning the luminance up slightly and reducing the ‘Detail’ slider. The detail and sharpening will always be in conflict with each other, so experiment. One other thing you can use is the ‘Adjustment Brush’ to apply sharpening or other effects to specific areas of the image.
Avoid Dead Eye
When looking at your bird photo, look closely at the eye to see if there is a ‘catchlight’ present. A catchlight is a small fleck of light on the eye that is created from the sun. It makes the subject look much more alive (or much more lifeless) depending on if it is present in the photo. If you have a great bird photo, but it’s missing this eye reflection, you should export and open the image in photoshop, and use a very small feathered brush to paint some white on the eye.
Look at the photo and determine which direction the light is coming from, this will help you decide where to add the white fleck in. Don’t make it too big or harsh, you’ll know when it’s right a look natural.
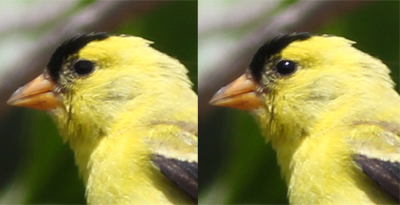
A catchlight is extremely important. If there, it’s something a regular viewer never notices, but if it’s not, something about the photo will definitely look off. Look at this photo of an American Goldfinch that I took to see an example of before and after a catchlight was added.
Compare with Original
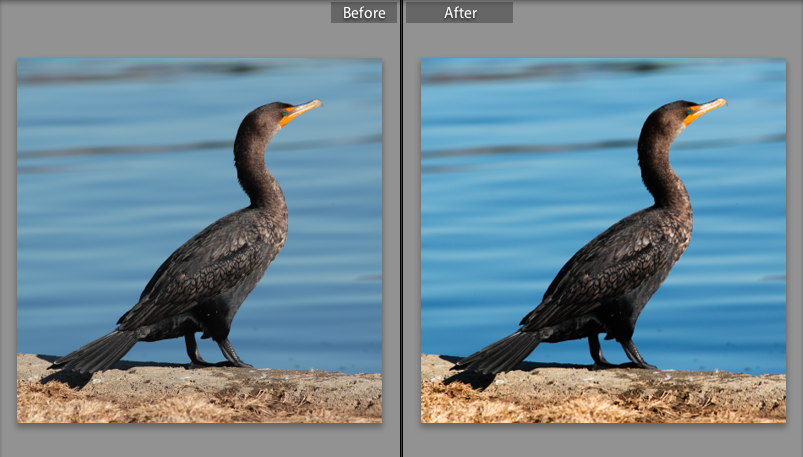
Lightroom has a great feature to compare the current, edited image, to the unedited original. Click on the right “Y | Y” icon to cycle through comparison views. It will show you different split images layouts to see the differences between the before and after editing. It’s a great tool to see if you’ve been too overzealous in your editing, or if a change you did made no real difference to the photo. Alternatively, press “\” to flip back and forth between the edited and original image.
Export
Once all the photos are finished being edited, I do a final review to make sure I’m happy with all of the images, I then export my photos into a photography folder in my Dropbox. It is organized by location, then date. When exporting images, you can set up and export them with a watermark if you like or just import as-is. Depending on where they end up, I sometimes export them multiple times, with and without watermarks. Make sure to do regular backups of your computer hard drive—you don’t want to lose all of your beautiful photos!
Try out a free trial of Creative Cloud or get it for just $10/month to start making your bird photos look amazing.