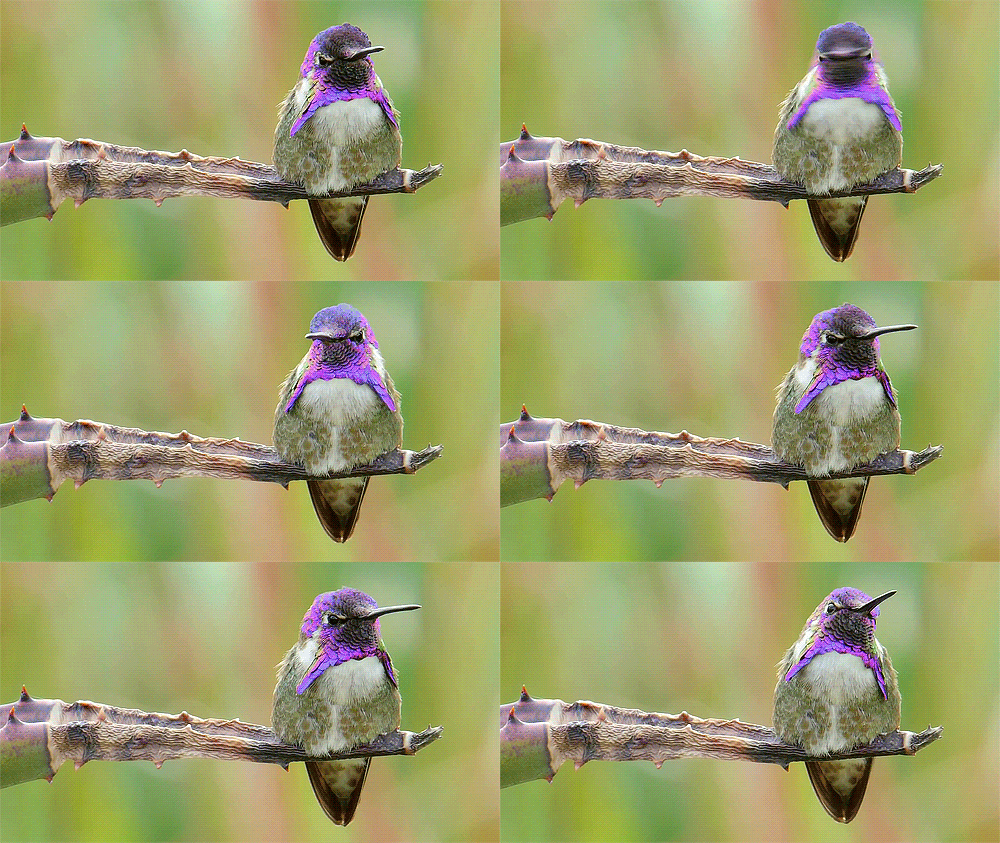
Tumblr has a great audience and is a wonderful place to share your bird photography or animated GIFs. GIFs are one of the most popular types of media shared on Tumblr, their movement and tendency to be funny or beautiful make them very likely to be reblogged. I create all of my GIFs with Adobe Photoshop CS6 or CC on a Mac (only $10/month for Photoshop/Lightroom). The process is the same for most versions of Photoshop.
Trim
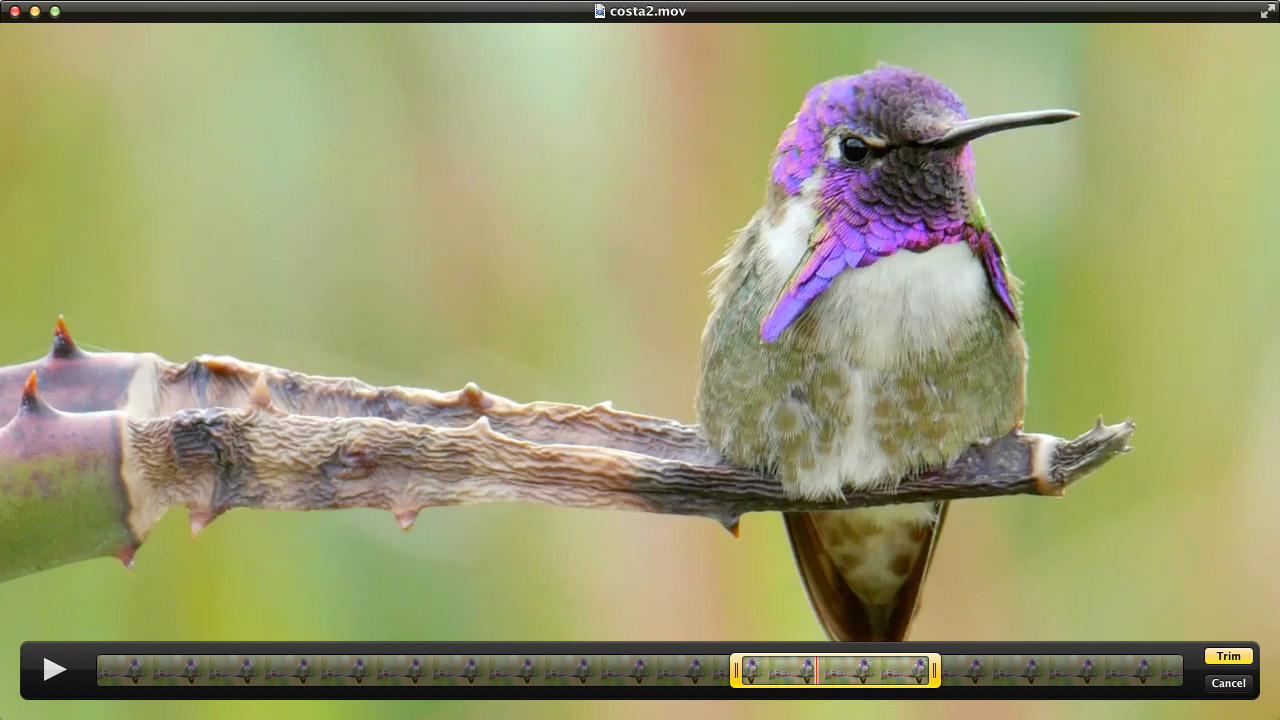 The first step is to watch your source video and trim the video clip to roughly the section you want to turn into a GIF. If you are trying to make a GIF from a YouTube video, download it easily using offliberty.com. That site isn’t shady and doesn’t require any janky java plugins. Then, open the video in QuickTime, push ⌘T or Edit > Trim, select the desired segment, save the clip, then rename the file to add “.mov” to the end. Confirm this to be the new file extension.
Import Video into Photoshop
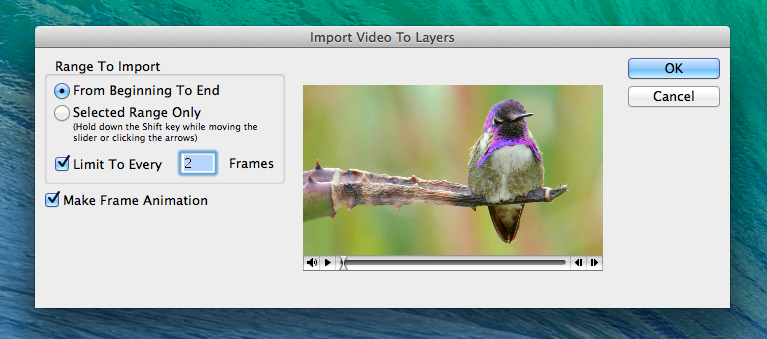 In Photoshop, choose File > Import > Video frames as layers. In the window that opens, I recommend setting it to import every two frames. This will cut the file size in half and you won’t usually notice a difference.
Animation Timeline
 Photoshop creates a layer for every frame in your video. Go to Window > Animation to see the Animation Timeline. You can reorder frames by dragging, delete individual frames, and adjust the playback speed.
Choosing the Right Size
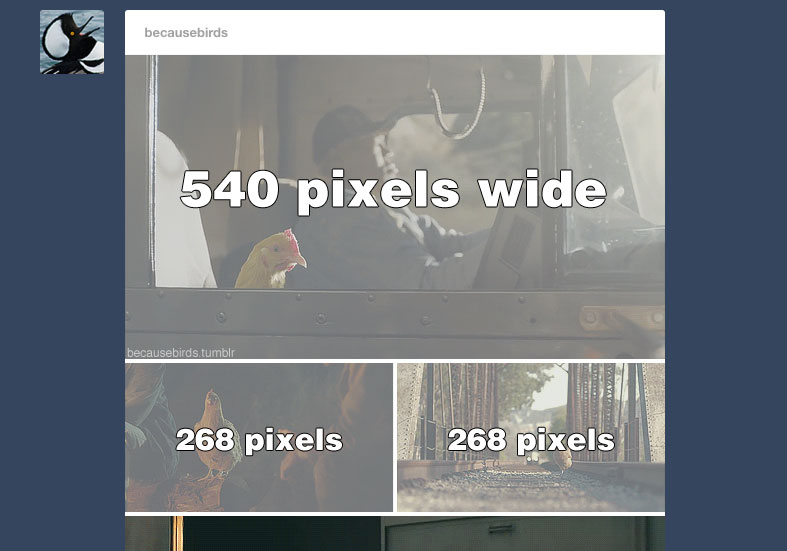
Before you go any further, you will want to decide on a layout for your GIF images. Tumblr GIFs can be a max of 540 pixels wide. When you put multiple GIFs next to each other a 10 pixel bumper is inserted between them. Resize your GIF with this in mind to keep the quality high. I usually don’t put more than two GIFs next to each other. With two across, each image will need to be 268 pixels wide. Now, resize your image to either 540 or 268 pixels wide depending on your layout. After the GIF is resized, it usually needs to be sharpened.
 [two_third]
Sharpen the GIF
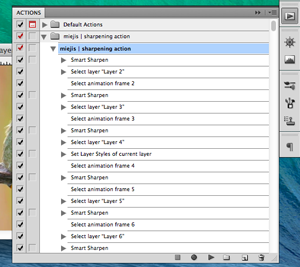
Use a sharpening action to automatically sharpen all of the layers. You will find that sharpening your GIF makes it look better and more crisp. Sharpening will increase the end file size a bit. Do this action before you delete any layers, if layers aren’t in sequential order when you run this action, the script won’t work. Sharpening is especially important on smaller (e.g. 268px wide) GIFs.
Click here for an advanced guide on GIF sharpening and layer renaming automation. [/two_third][one_third_last]
Using the Action
Install the sharpening action by opening Photoshop, going to Window > Actions. Then, in the drop-down menu, click LOAD ACTIONS. Select the action, then click OK. Select the first layer in the Layers column. Then, click the play button on the bottom of the Action box.[/one_third_last]
Adjust Playback Speed
Next, set the playback speed of every frame to .07 seconds, this is usually a good speed for most GIFs. You can make it a bit faster or slower if needed. To do this, click on the first frame in timeline then hold shift and click on the last frame. With all of the frames highlighted click the time below one of the thumbnails, choose other, and enter “.07”.
Check the File Size
 To check the file size and see how the final playback speed will be choose File > Save for Web & Devices. The window that opens will show a preview of your GIF as well as the file size.
GIFs uploaded to Tumblr need to be 2MB in size or smaller.
If your GIF is 500px wide, it will easily be larger than two megabytes. In order to get this file size smaller we are going to do a few tricks.
Going back to our hummingbird example above, when watching the video, there is only movement in one part of the frame, the rest stays still. We are going to take advantage of this.
Mask-out Static Parts of the Image
The secret to getting a bunch of frames in a single GIF and keeping it under two megabytes is masking out any portion of the image that can stay still.
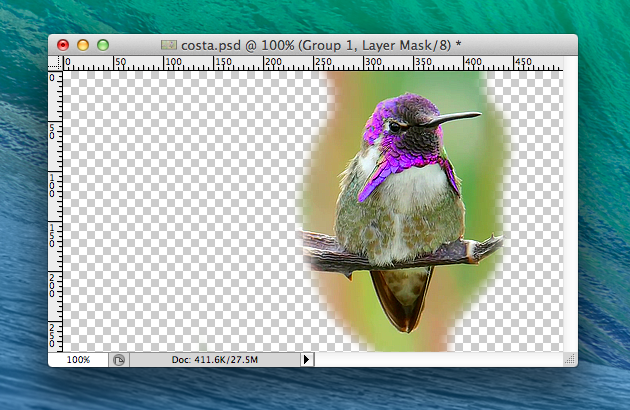
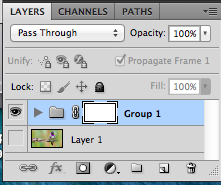 It only takes a few steps to do this. In the Layers window use the Shift key to select all of the frames in the GIF except the first layer. Press ⌘G to group all of these layers, then click the
 ![]() button. This will place a mask over the group. Click on any frame besides the first one in the Animation Timeline, switch to the Brush Tool (B) and paint black on the parts of the image that remain static. Even though you are painting black, you will see the layer disappear as if you are erasing it. Assuming the layer mask is still in focus (as can be seen by the white mask with lines around it in the image on the right), you won’t actually paint black onto the image.
button. This will place a mask over the group. Click on any frame besides the first one in the Animation Timeline, switch to the Brush Tool (B) and paint black on the parts of the image that remain static. Even though you are painting black, you will see the layer disappear as if you are erasing it. Assuming the layer mask is still in focus (as can be seen by the white mask with lines around it in the image on the right), you won’t actually paint black onto the image.
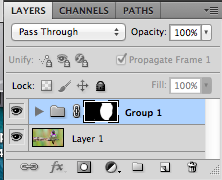 Finally, in the Timeline, select all of the frames and click the eyeball box next to Layer 1 to make this layer show up in each frame. This fills back in the background that you masked away from the other layers. You can see what my layer mask looked like on the left. Doing this will make your GIF size much smaller and is the secret to make GIFs that work great for Tumblr.
Save the GIF, Finally!
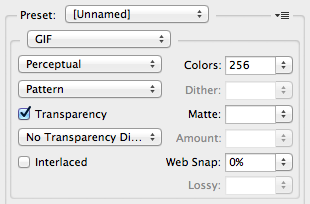 Once again, go to File > Save for Web & Devices. There are an array of options to tweak to fine-tune your GIF. You can adjust some of these settings if you are desperate for a smaller file size and don’t want to delete any additional frames.
The Dither setting should be set to either Pattern or Diffusion. It’s a matter of taste and can depend on the GIF as to which one looks better. Choosing ‘Pattern’ makes the file slightly larger.
If Diffusion is selected, you can add “Lossy.” I wouldn’t enter any more than 12 in this box, if you must, as it can make the image look funny. It will help reduce the size of the file though in dire times!
Once you are happy, click Save! Hooray! Play your GIF and see if the speed and quality are fine. That’s it! The information in this article may seem a bit overwhelming, but do it a few times and you’ll get the hang of it in no time!
Let me know in the comments if you have any questions or any tricks up your sleeve to make GIFs!
