
This year, I learned about a project called BirdNET-Pi which, when installed, turns your Raspberry Pi into a 24/7 monitoring station. This station records audio constantly and uses BirdNET’s AI model to identify the birds it hears. I also built a digital counter to track the birds that visit my backyard.
BirdNET-Pi is accessible over your local network once set up and gives you a dashboard of recently detected birds. It will show their spectrographs and a photo from Flickr.
What’s needed
- Raspberry Pi 4B, 3B+ or 0W2, or Le Potato (much cheaper) and wifi adapter [instructions]
- micro SD card
- USB microphone or USB sound card and regular lavalier microphone
I grabbed one of my Raspberry Pi 3B+ and started preparing the SD card according to the installation guide (3B+ 0W2 and 4B). The OS was installed smoothly and the Pi powered on, then the BirdNET-Pi software was installed with a single command once I connected to it over SSH.
The microphone for the BirdNET-Pi setup can be a USB mic or a regular one connected to an external USB sound card (a glorified dongle in this case). I opted for the dongle and regular lav mic since both were available with same-day shipping. Thankfully, once I connected it, the BirdNET-Pi started detecting audio right away.
For my initial, hasty BirdNET-Pi build, I plugged the Raspberry Pi next to my back door and ran the microphone wire under the door, and taped it to the exterior house wall. This picks up the sounds from my backyard birds.
From proof-of-concept to a permanent build
Once this proof of concept was done, I moved on to build a more permanent solution. I researched and found this BirdNET-Pi setup from Pixcam that includes an outdoor enclosure. I picked up all the needed items, substituted the Ethernet port for another USB, and began work on building my own outdoor BirdNET.
Items needed for the outdoor enclosure
- QILIPSU Hinged Cover
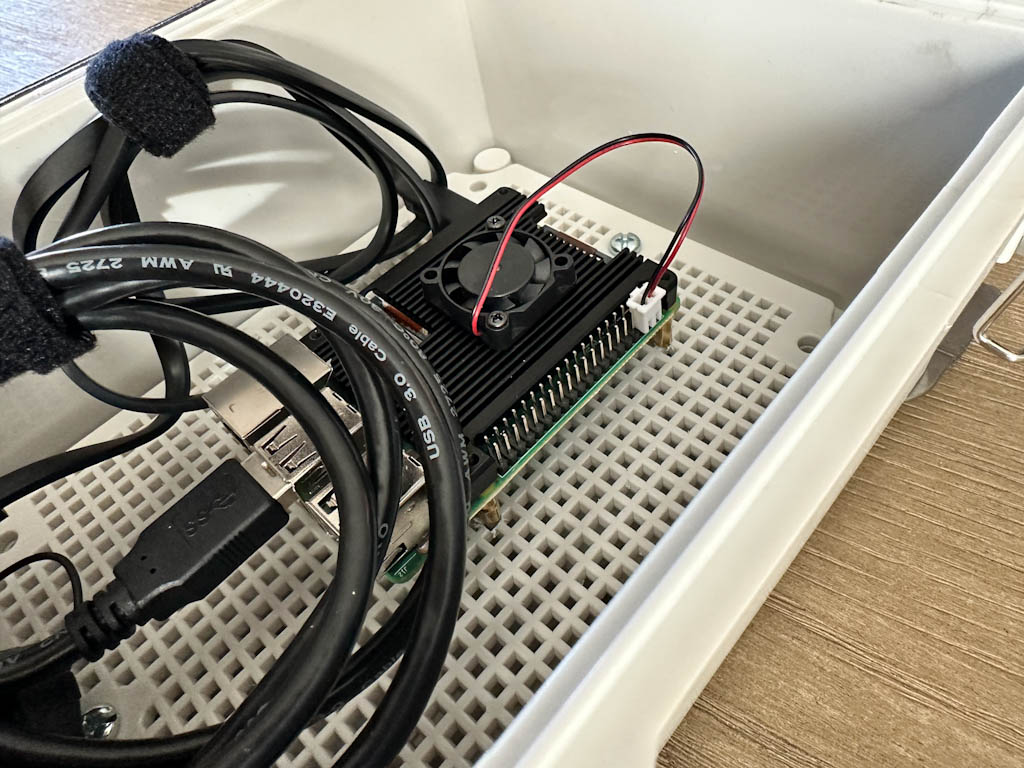
- Geekworm Raspberry Pi 4 7mm Embedded Heatsink with Fan
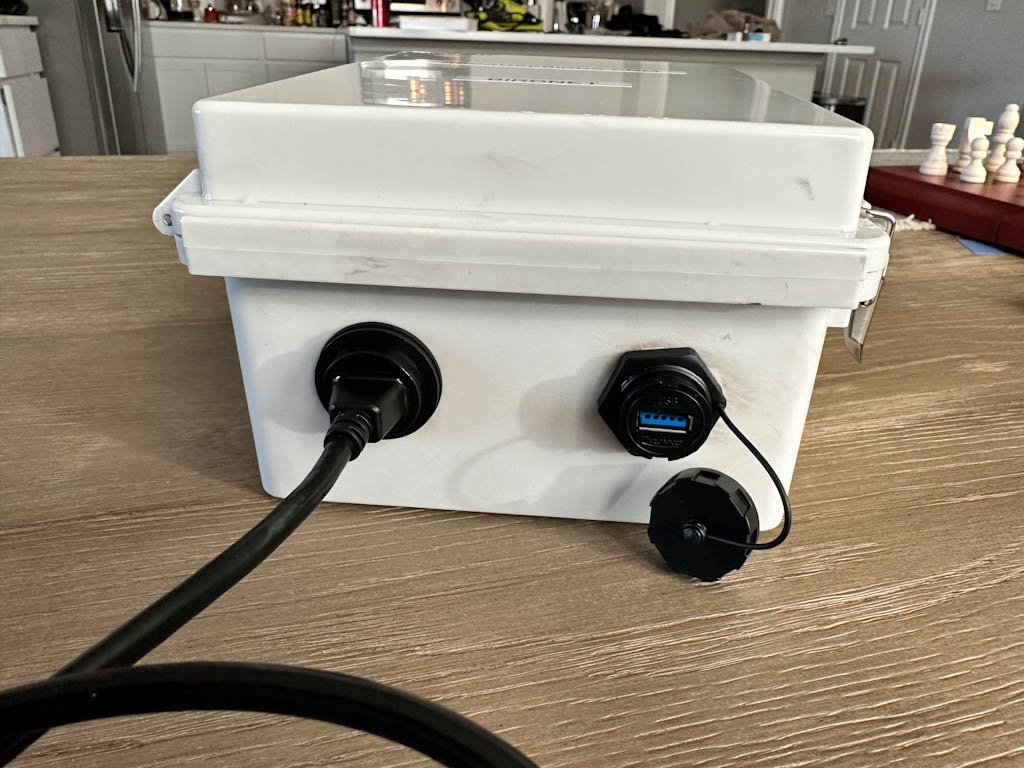
- CNLINKO USB 3.0 Connector
I removed the Pi’s case and then struggled to install a fan/heat sink due to a missing piece. I improvised my way into getting it securely attached.
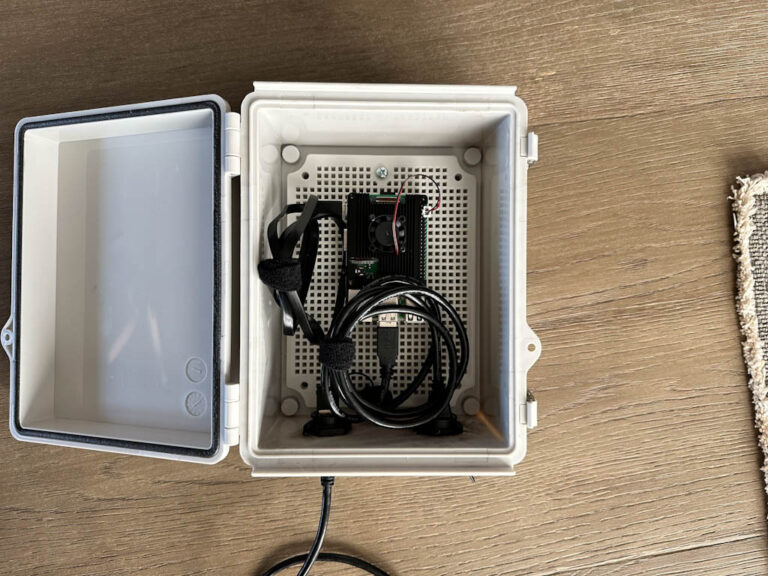
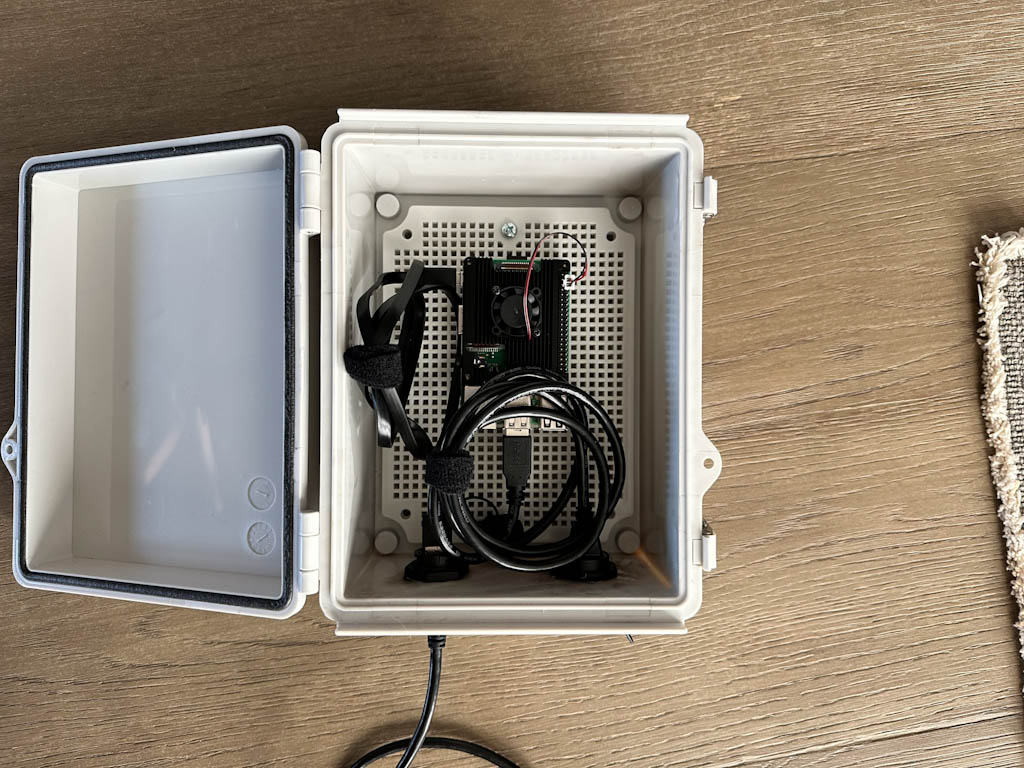
The fun part was getting the enclosure ready for the Pi. This box is built to house electronics, so it came with a mesh board to which you can attach various components. I drilled some small holes to help attach the Pi to the board, then moved on to the enclosure itself. The guide I followed recommended drilling the holes with some fancy drill bit I didn’t have so I used the largest one I had to start and struggled my way into getting it the right size. Repeat this arduous process for the second hole.
With the box prepped, I screwed in the mesh board, plugged in all the wires, printed cute labels, and admired the work.
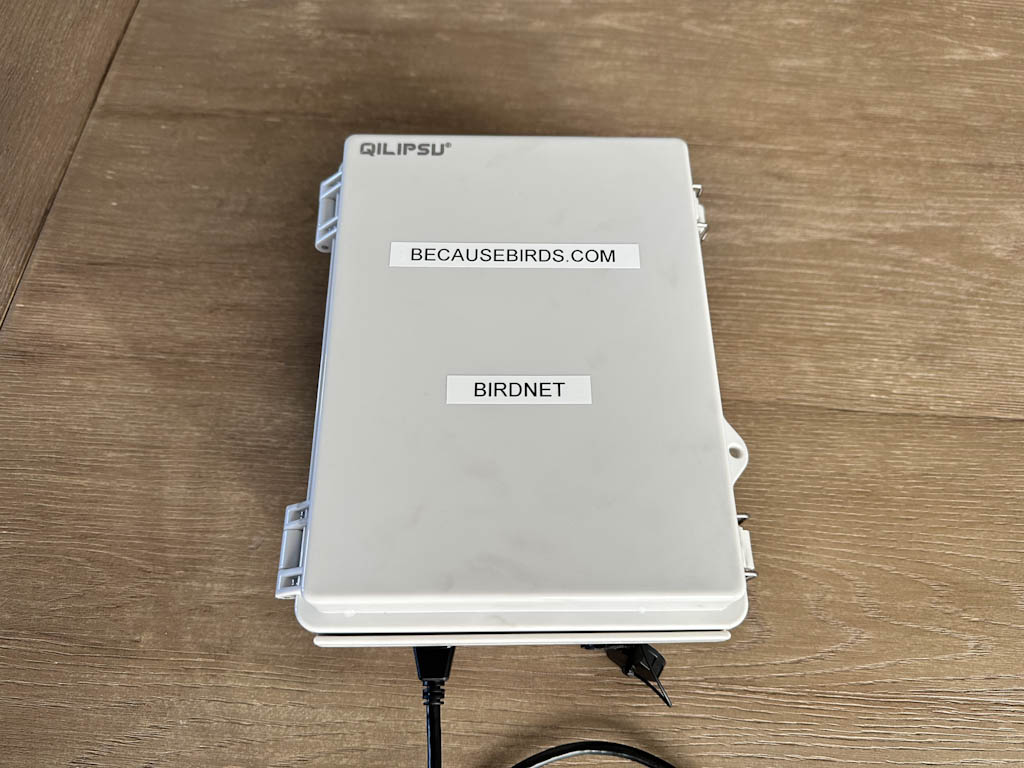
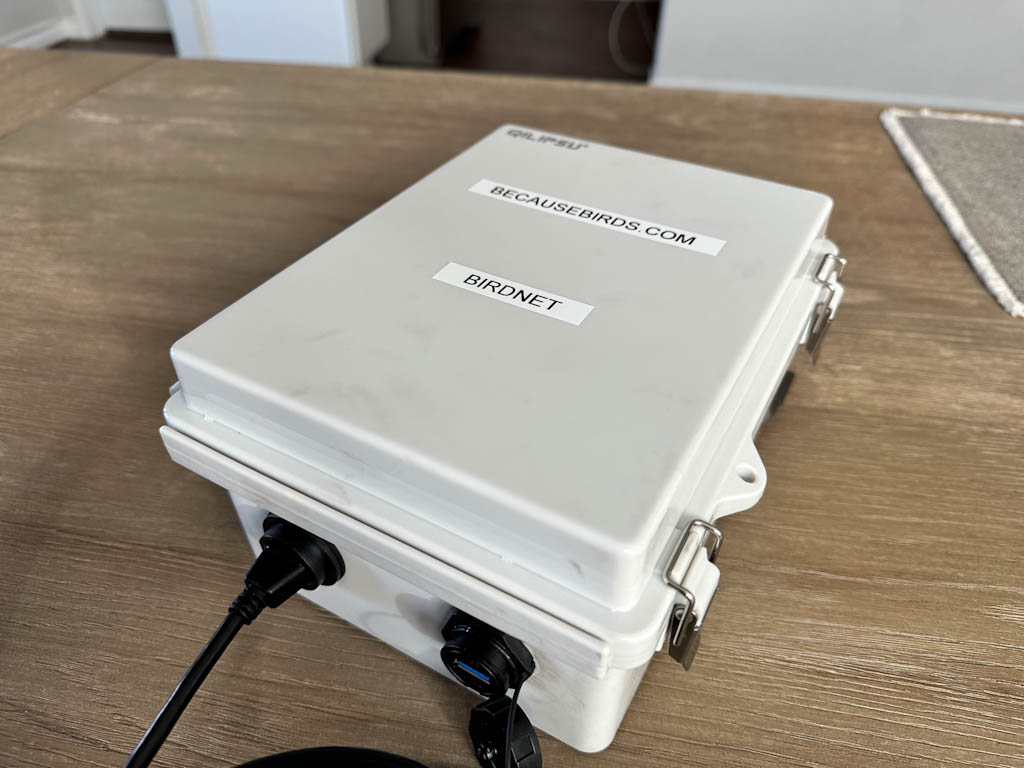
The final install
Then I mounted the enclosure near an outdoor outlet next to the backdoor.

I plugged it in and, success, it worked! The only issue I ran into post-installation was I noticed the USB microphone picking up interference. To fix this, I plugged in my previous sound card dongle and 3.5mm lavalier mic and it solved the problem.
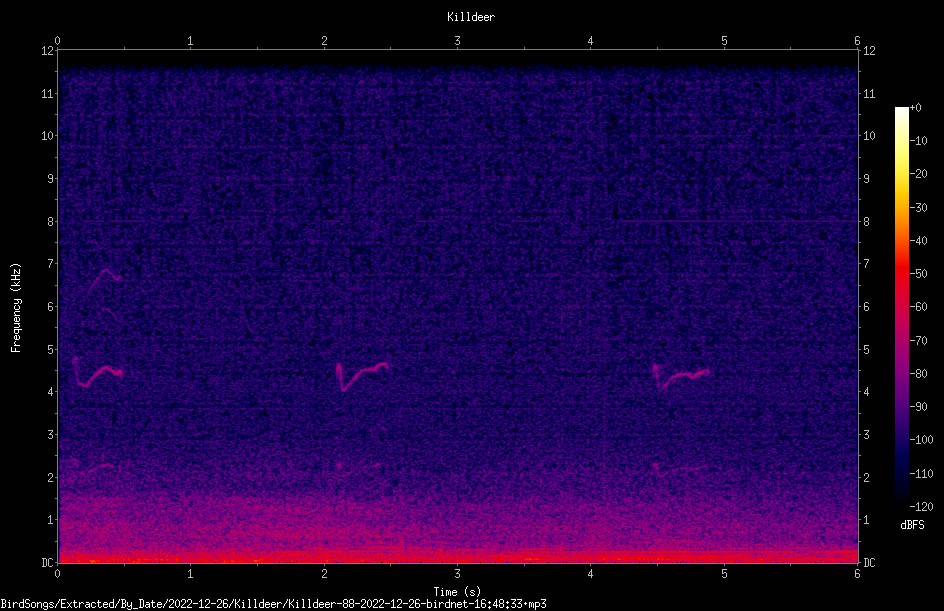
Spectrograms and recordings arrive
Here is a clip of a Killdeer the Raspberry Pi captured along with the spectrogram it generated:
Check out this live dashboard I built. It pulls in live recent detections and leverages the BirdWeather API to request the data.
My BirdNET-Pi Station live stats

Birds acoustically detected in the past 24 hours
0
total detections
101952 lifetime detections since 12/22/22
My BirdNET-Pi station listens and analyzes 24/7 the birds that visit my yard. Each detection is automatically logged and submitted to BirdWeather.com. The live stats above reflect recent species and the frequency detected.
I would have left the pi inside and just put the microphone outside.
I wish! That’s what I did before I got the outdoor enclosure. I hid the Pi in a closet and snaked the lav under my backdoor to get the mic outside. It worked but wasn’t ideal. If I had a better option, that would definitely be preferred!
So just wondering Jeffery I also live in Central TX, even with the fan and heatsink aren’t you concerned about the Pi overheating during the summer?
We’ll see! I hope that it’ll run well enough even in the summer. Perhaps there is a way to build a small source of shade above the enclosure?
Any updates? How long are you logging for?
Hi Jeffrey,
thanks for your great project documentations!
How did you build that great little live dashboard using the BirdWeather API?
I just stared my https://app.birdweather.com/stations/782 and would love to integrate a little dashboard like yours into a website.
Greetings from Austria,
Robin
I’m glad you enjoyed the write-ups!
I built it using a free WordPress plugin called JSON Content Importer which brings in the latest BirdWeather data when the page is loaded.
I just wrote up a guide for you on how I did it: Create a live BirdNET-Pi dashboard using WordPress
Have fun! Let me know if you end up doing it, I’d love to see your version!
Jeffrey so my set up has been running for a month or so now and all is great, thanks again for the How- to. I do have a question, Do you have any Idea if you could or is there a way to run an array of microphones instead of just the one? Thanks
The only way I know how is via RTSP video streams. If you have security cameras with that on the property you can input those urls into the settings and it will analyze both streams.
Wait, I haven’t gotten all the way into this yet, so I’m sorry if the answer to this Q would become obvious once I finally run the software, but if I have multiple IP cameras on my network am I able to pull audio from the microphone from each of them via the RTSP output?
Meaning I don’t actually need a usb mic?
I will add those IP cameras typically have a ton of audio gain and no wind buffer, so I suspect they won’t be amazing. Any thoughts on that aspect?
Hi Colin,
Yes, if you’re running birdnet-Pi you can analyze as many RTSP ip camera streams as you want concurrently. All you have to do is separate your RTSP stream URLs by commas when you’re inputting them on the Advanced Settings page.
If you’re using birdnet-go, it also supports multiple streams.
https://github.com/tphakala/birdnet-go/discussions/205
Wow, this is an amazing project. Awaiting parts and pieces to build this thanks for the detailed write up.
One question you may be able to help me with, as I’m much better at the building side than any programming (I can flash a Pi but then it gets murky)… I saw a fork of BirdNet-Pi called BattyBirdNET-Pi and was wondering if one RPi could run both with 2 separate mic’s to have the best of both worlds. Fun daytime bird stats and utilize the device for some night time discovery.
Hi Rick, thanks for checking it out!
One idea for you to keep in mind as these projects continue to grow is to install Docker on your Pi. Make sure to use the 32-bit or 64-bit guide accordingly. The benefit of docker is you can install and run multiple apps at once. Often these open source have easy scripts to install via Docker. I’ve been using a fork of BirdNET-Pi which has a nicer interface and can run in Docker.
BattyBirdNET-Pi doesn’t seem to support Docker yet, but it may become an option in the future. That project is SO cool and now I want to do it too! I had no idea it existed!
Here’s another longshot idea that depends on your setup: BirdNET-Pi supports RTSP streams from security cameras, so, if you happen to have any wired cameras running at home, you could run the bird or batty software on an indoor computer and use the IP address to a camera within earshot of the birds outside. My BirdNET-go instance has been running great for a few months listening to one of my backyard camera feeds.
Thanks Jeff this is very helpful!
So glad I was able to point in the direction of something new!
I haven’t built anything yet, awaiting parts but using yours as a template. I just figured that if the box is built and implemented why not have it do both with the same hardware…..need to save on costs somewhere.
Thanks again and welcome to the new rabbit hole.
Sharing this follow-up from Rick on BattyBirdNET-Pi’s recent update which detects birds during the day and bat species at night (if you have an ultrasonic microphone).