
How to edit bird song recordings
Author
Jeff Mann
Date Published
You've captured a few recordings of birds on your phone or recording equipment and now you want to edit them to keep or upload to eBird. What is the easiest way to do this? Here is a quick guide that will help you master your recordings in less than five minutes using Audacity. This guide will help you do three things: normalize, filter, and crop the audio.
Before we begin, if you are uploading audio files to eBird, the less editing the better. Scientists find the most value in audio recordings that are as true to the source as possible. The information contained in this guide follows the best practices recommended by Cornell Lab of Ornithology.
Download Audacity
Audacity is free audio editing software for Windows, MacOS, and Linux that can be used to make your recordings the best they can be. Download Audacity
Quick start: Import and use this Audacity macro to quickly apply the high-pass filter and normalizing.
1. Open and import
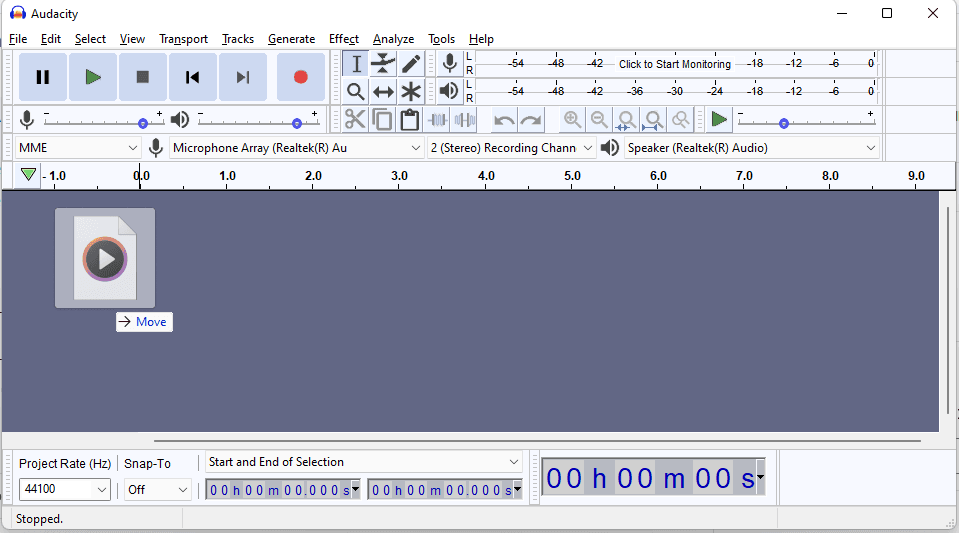
Once your audio files are on your computer, open Audacity and either drag the file into the new project window or choose File > Open.
2. Switch view to spectrogram
The spectrogram view is essential to analyze and learn from your recordings. It will show the frequency of the audio in the file. The darker the markings, the more pronounced they are. If you see a spectrogram with a clear background and dark or intense frequencies it's an indicator you have a decent recording. But there is more you can do to it to make the audio shine.
/
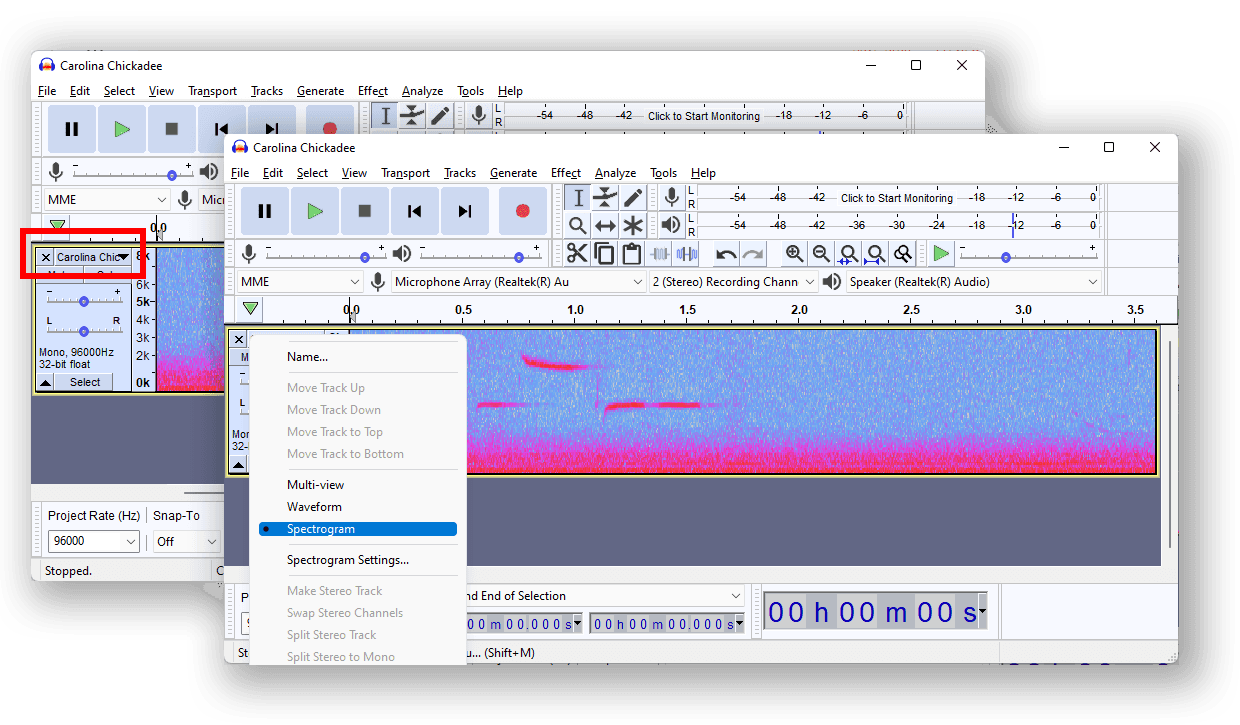
You can also set the default view to spectrogram and change the range so it doesn't show as many of the lower frequencies.
3. Select all and normalize the audio
You'll want to boost the sounds in your audio clip and bring out the bird's song or call. To do this, we'll Normalize the clip.
Press CTRL + A or CMD + A after clicking on the track to select the entire clip. Then choose Effect > Normalize and ensure "Normalize peak amplitude" in the window that appears is set to -3.0dB.

Select Effect > Normalize
You'll notice this makes the parts of the clip with the bird song more vibrant than before.
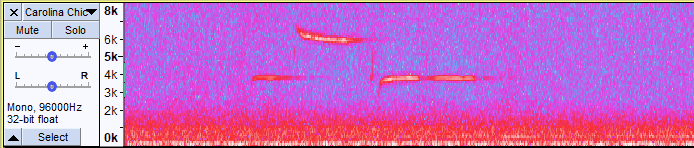
The more vibrant bird song spectrogram
4. Add a High-Pass filter
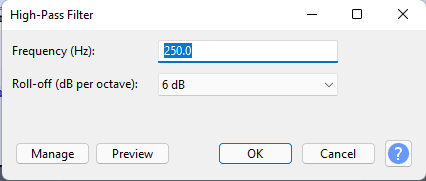
In many audio clips you'll record, you'll find a constant low-frequency ambient noise or wind. Adding a gentle High-Pass Filter helps remove some of it. Select Effect > High-Pass Filter.
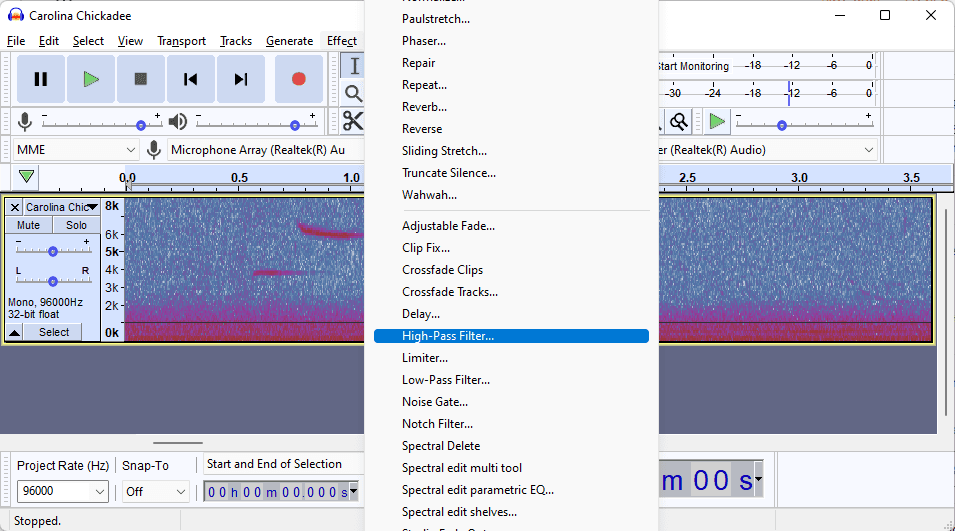
Adding a High-Pass Filter to filter out the low-frequency sounds
Set the frequency to 250Hz and Roll-off to 6 dB.
205Hz
5. Crop and delete sections as needed
Click and drag to select sections at the beginning and end of your audio clip and press Delete to remove any unnecessary parts. If there are sections in the middle of your clip you wish to remove, delete most of it and leave about a second in between the remaining parts, highlight the remaining part and select Generate > Silence to add a second or so of silence to indicate there is a break in the audio.
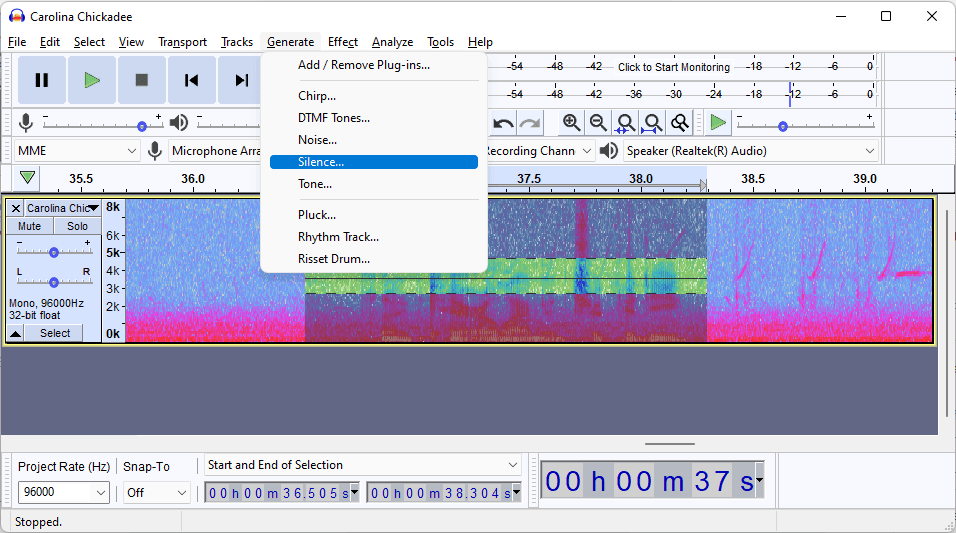
Add silence but don't delete audio between bird calls
6. Export the final file
Your audio clip is now prepared for export. Choose File > Export and select WAV format.
Thats it! Your clip is ready to be uploaded or archived for a keepsake.
More reading:
Comments from the community
Leave a comment
No comments yet. Be the first to share your thoughts!